In case you weren't able to make it over to It's A Hodgepodge Life last week to see my guest post, I didn't want you to feel left out. Here's what I shared with Gay's lovely readers:
Today I've got something to help get you organized. We recently bought our first house (yay!) and I wanted to start things off clean and organized.
Our magazines needed a home-they were previously living in a cardboard box in our spare room, and never being used (which is why we saved them!) I found a set of 5 plain magazine files at IKEA for only $1.99! But I wanted to jazz them up a bit.
Ta-da!
The best part is, they can be customized however you like!
To make your own, you'll need:
Magazine files
Scrapbook paper-you'll need one sheet per large side of your file and one sheet for every two files for the ends, so 13 sheets total
Scissors and a pen or pencil
Twine
Mod podge and brush
Spray adhesive
Ruler
Scrap cardstock and tag punch
For starters, poke a hole about four inches up the long, skinny side of your file in the crease on each side.
Take a piece of twine-I cut 10 at about 6 inches long each-thread it through your hole and tie a knot on the inside of the file so the twine doesn't come out. Repeat on the other side.
Measure your two ends and cut out a piece of paper to fit each.
Using your file as a guide, trace the curvy side onto your paper
and cut it out. Repeat for the other side.
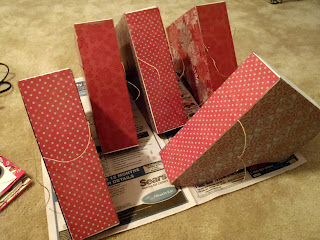
Using your spray adhesive, attach all of your pieces of paper to your file. Repeat on all of your files. As you can see, you'll need to keep your twine on the outside. I tied mine up while the adhesive dried to keep them out of the way.
Once the adhesive has dried, apply a thin layer of Mod Podge to the entire box.
While your files dry, it's time to make your tags. Using my handy-dandy tag punch, I punched out five tags.
Like so.
Then I picked out some rivets that matched my paper.
Using the handy tool and a scrap piece of 2x4, I punched a small hole in each tag,
Inserted the rivet,
And using this guy,
Flattened the rivet.
So then I had five tags all ready to be used.
I labeled each tag and tied them onto the files using the twine (I bet you were wondering what that was going to be for at the beginning, weren't you?)
And volia!
Pretty magazine files all labeled and ready to go. And since the tags are removable, you can change them out whenever you need to!
Here they are at home on our bookshelf in our "office"
I love 'em!
Are you doing any spring cleaning yet?














Make Some Scribbles!
Post a Comment
I ♥ your comments! They make my day :)
If you have questions, please email me
scrapsnscribs@gmail.com