


Showing posts with label fall. Show all posts

Wednesday, October 1, 2014

{Handmade Goodie of the Week} Painted Polka Dot Monogram Pumpkin

What a better way to come back to blogging than with a fun fall tutorial!


Today I'll be sharing with you all how to make this super-cute Painted Polka Dot Monogram Pumpkin.

Try and say that 10 times fast!  

It's no secret I love pumpkins.  Well, it might be for those of you who are new to Scraps and Scribbles.  So now you know.  I love pumpkins.  Which is probably why I love fall so much.  Each year I try to make a pumpkin-type craft to add to our Halloween/Fall decor.  This year, both of my littles are old enough to get in on the action, so I wanted something we could do together.  Little Man was really taken with the craft pumpkins at Michaels and they were half off, so I grabbed one for us to decorate.  I'd really been wanting to make a monogrammed pumpkin, so this was perfect.

To make yours, you'll need:

A craft pumpkin in whatever size/color you'd like
Paint-you'll want a background color, a dot color and an outline color
Brushes
Dotting sponge or pencil with unused eraser
Accent Ribbon

What to do:

I started by drawing a large "D" on my pumpkin.  You can either free-hand this, or use a stencil or if you have a crafty cutting machine, cut out some vinyl to use as a stencil-whatever is your style.


Then, using your background color, fill in your letter.  You might need to do more than one coat.  Allow to dry completely before moving onto the next step.


Once your paint is completely dry, it's time to get dotting!


I used the eraser end of a pencil for my dots, swirling it around to make some a little larger.  You can use whatever method works best for you.  Again, let your paint dry completely before moving on to the next step.


Once your dots are dry, take a fine tip brush and your outline color and outline your monogram.  Now, this step is completely optional, of course, so if you feel your monogram looks awesome without an outline, skip to the next step or call it done.


Once your outline has dried, take a piece of your accent ribbon and tie it in a nice bow around the stem of your pumpkin.


And that's it!  An easy, cute DIY project that's great for Halloween AND fall decor!  I'd love to see your take on this-if you make one, post a pic of your finished project on the Facebook page!


Tuesday, November 16, 2010

Signage Update

Remember this sign from way back in July?


Well, I had mentioned back then that I was going to give it an update for each holiday.  I totally spaced on Halloween, but I have made a new insert for Thanksgiving.


Since I'm too poor to own any type of craft cutting machine, I used my freezer paper method (you can find the tutorial here.)


I found a font I liked, blew it up to the right size and printed out, then traced it onto my freezer paper.


Then cut out the letters,


filled them in with some brown paint and ta-da!


I added some ribbon (if you notice, it's the same ribbon from my quick fall sign) to the bottom to give it a little something extra ;)


I'm thinking about cutting out a little turkey or pumpkin to fill that empty spot.  What do you think?


post signature

Tuesday, November 9, 2010

Hand-made Goodie of the Week: Quick Fall Sign

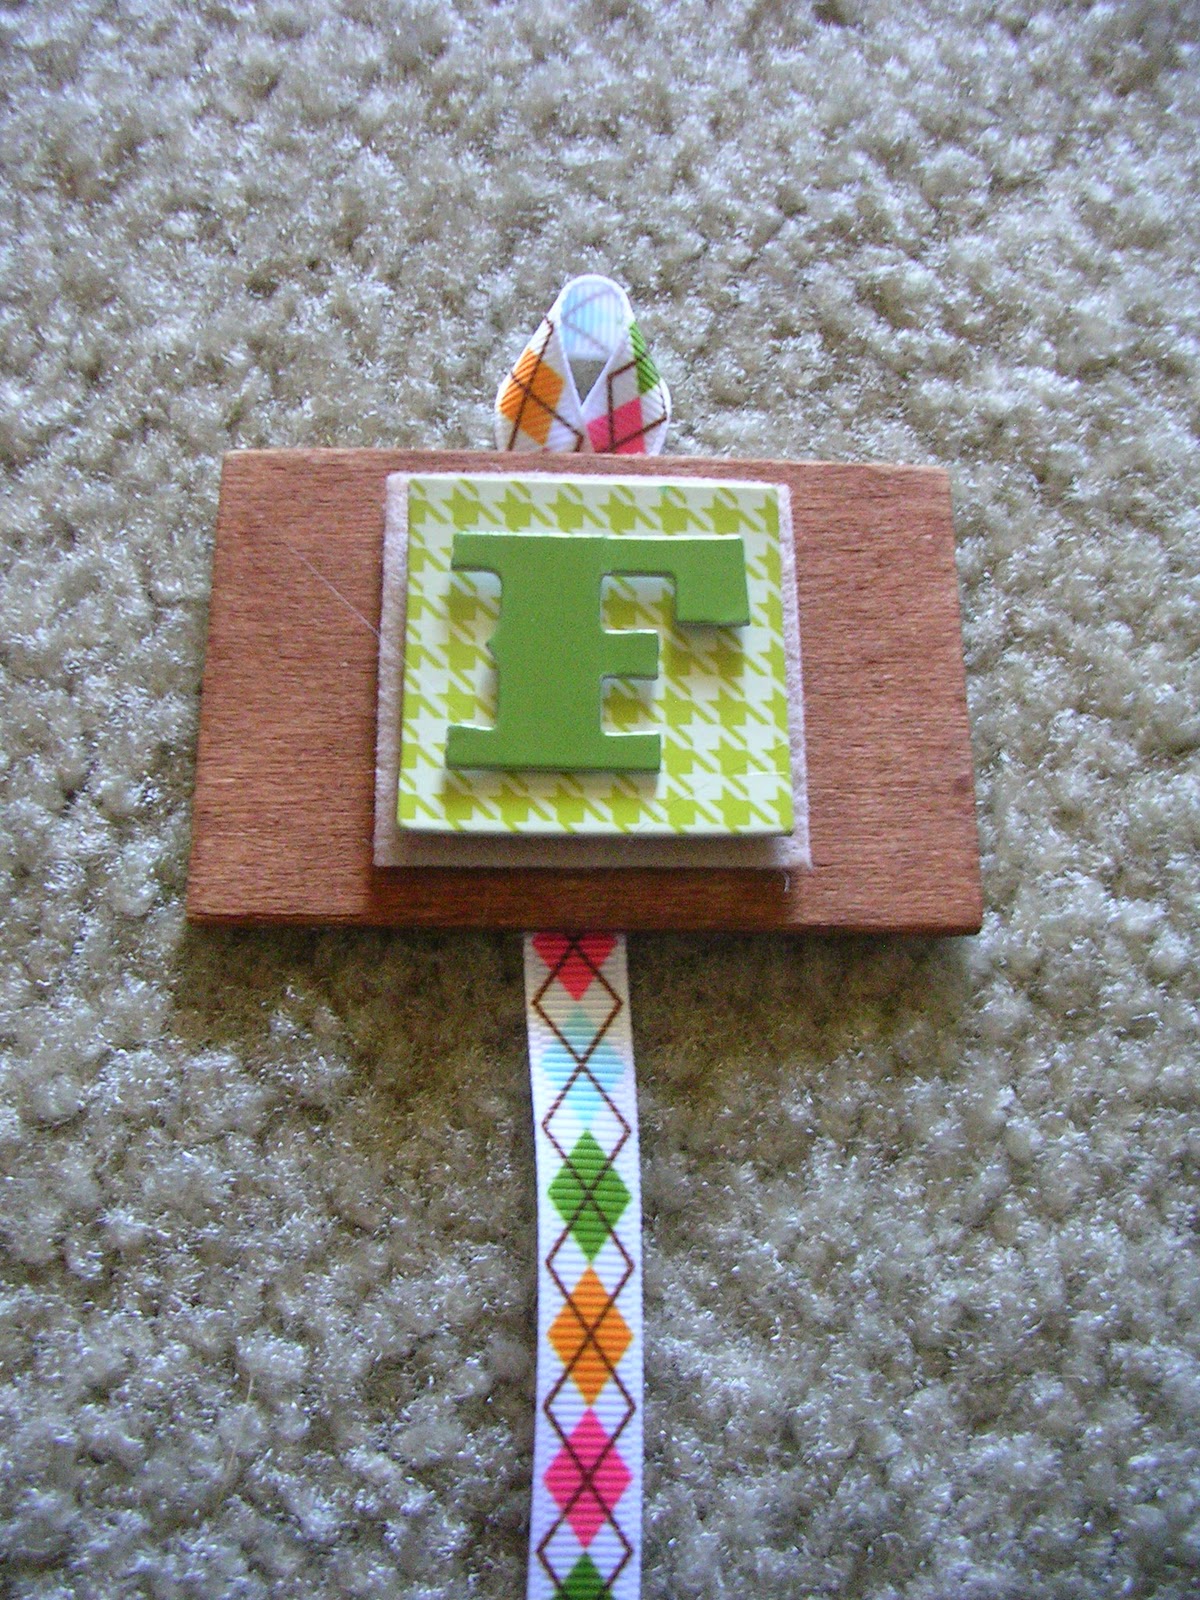
It's no secret, I like simple things.  This little Fall sign took all of 15 minutes to make and I love it.


To make yours, you'll need:


Letters to spell out "Fall"-I used scrapbook stickers that I got on clearance a few months back
Four wooden rectangles-can be found at Michaels or Joann's
Brown paint
Ribbon
Hot glue and glue gun


Start by giving your wooden rectangles a coat of brown paint.  You can used whatever color you want, but to me, brown is a fall-ish color.  Plus, I really wanted to keep the wooden feel of the rectangles.


Let them dry.  Once dry, center and attach your letters.


Like so.


Cut a length of ribbon long enough to string behind your rectangles and have some extra for the bottom and to make a loop at the top.  My piece was about a foot long.


Make a small loop at the top of the ribbon and glue in place.  This will be used to hang your sign when it's finished.


Trim the other end by folding it in half and cutting a piece off at an angle.


Begin adding your letters by gluing the ribbon down the center of the back of the rectangle.  


Repeat until all of your letters are attached.


And there you have it!


A cute little sign for fall!

post signature

Monday, November 8, 2010

Fall Festival Link Party

Hey guys!  I'm back from my week of no blogging.  I really appreciate everyone being so understanding.  I really needed that week to get my life back in order!  There are some great things coming this week that I hope you all will enjoy.

Fall has officially found Florida.  I got to dig out my cozy sweaters this weekend (finally!) 
In celebration of Fall's arrival (for me, at least), it's party time once again!  

Here's how it's going to work:

*Link up your fab Fall-related projects-it can be crafts, sewing, recipes, whatever you'd like to share that has to do with Fall.  You can link up as many projects as you'd like!
*Grab the party button and hang it up somewhere on your blog for others to see.  This helps spread the word, because when it comes to parties, the more, merrier!
*When linking, please link to the post where your project can be found, not to your blog's main page.  No giveaways or unrelated posts, please.  These will be deleted, which makes me feel mean, so don't do it!
*Visit your "neighbors" to the left and right of you (as well as anyone else you'd like to check out) and leave them some comment love.  It makes people smile :)

The party will be happening today through Thanksgiving.  I'll be picking out projects to show off during that time, so start linking up!  

Can't wait to see what you all come up with!

post signature

Tuesday, October 26, 2010

Halloween Madness: Rolly Poley Scarecrow

You may have seen my my rolly poley scarecrow hanging out near my burlap pumpkin last week.  Now I'm going to show you how to make your own!


This one I made for my sister.
To make your own, you'll need:

Halloween or Fall-themed fabric
Raffia
Felt to match your fabric
A small twig
One large (1 1/2 in.) wooden ball and two small (1/2 in.) wooden balls
Black paint
Hot glue and gun
Needle and thread
Polyfill
Small straw hat
Rice


Take your fabric, fold it in half and cut out a semi circle.  


So it looks like this.  You can skip the folding and just cut out a circle about 9 inches wide.


For the arms, cut out a rectangle 6 1/2 x 4 inches.


Fold the rectangle in half and stitch the edges together.


Turn right-side out and stitch one end close.  Then stuff with polyfill and then stitch closed the other end.


So it looks like this.


For the torso, take the circle and stitch around the edge and gather it together, but don't tie it off yet.  


Leaving a small opening in the circle, pour a small amount of rice in to act as a weight.  Then fill with polyfill, pull tight to close and tie closed.


Glue the arms onto the torso, like so.


To make the collar, take a piece of your felt, cut a small circle, 


 then cut triangles out to make the edges look like this.


Glue the collar in the center of the center of the arms, and glue some small pieces of raffia underneath to look like straw.


For the face, take the large wooden bead and paint a face mine.  I did mine like a jack-o-lantern.  


Allow to dry then glue on top of collar.


Take your small straw hat, and hot glue small pieces of raffia inside, almost all of the way around.


Then glue onto the head.


Like this.


For the hands, you can glue on the small balls on either
 end of the arms and tuck in some raffia 


Or you can make straw hands by gluing some raffia in place before sewing up the ends.


For a little added touch, you can make him a broom.  Take your small stick and some bits of raffia and wrap a long piece around to hold them in place and glue the ends down.


And there you go!

post signature
Related Posts Plugin for WordPress, Blogger...