Friday, May 28, 2010

Fashion Fridays: Showing Off-Mrs.Matched

The lovely Andrea from What Should I Wear? sent me some links of her current cravings for the Fashion Friday giveaway and I'm going to share them with you.


She found this super-cute tunic over at Hemline.  I'd never heard of Hemline before, but I took a look around and there are some really cute things there.  I definitely recommend checking it out.


And how about this cute belted peasant dress from Forever 21?  I think it's just perfect for summer.  Andrea liked it so much that she decided she couldn't live without it and ordered it!


She shared her make-up epiphanies via this post on her blog, What Should I Wear?  As an Avon lady, I love it when someone finds an awesome Avon product and shares it!  This foundation is truly awesome!


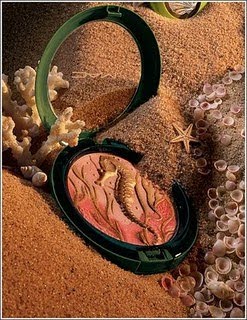
She also shared this awesome post from Beauty is the New Black on MAC's awesome "To The Beach" line.  I'm loving all of the beautiful colors!

Thanks for sharing, Andrea!

Thursday, May 27, 2010

Giving It Away!

I love giveaways, don't you?  Here are a few happening right now that caught my eye:


Someday Crafts is hosting a Flirty Apron giveaway-you could win the apron of your choice.  I love this brown and green one!


Did you know that Shabby Apple has swimwear?!  Grograin is hosting a Shabby Apple swimsuit giveaway!  I'd love to rock this blue halter at the beach.

And don't forget about the Fashion Friday giveaway going on here at Scraps and Scribbles!

Tipping Thursday: Skincare Part VIII-Skin Tone

How do you know what colors are right for you?  It’s all about your skin tone.  Your skin tone effects more than just your make-up, too.  It helps you make better decisions on colors for hair and clothing, too.  Determining your skin tone is actually a lot easier than you think.  There are 2 basic ways to do this.  They are:

1) Flip over your arm and look at the veins. Veins that appear greenish indicate yellow undertones which means that your skin tone is warm. Veins that appear to be more blue indicate blue undertones which means your skin tone is cool. Determine if your tone is warm or cool.

2) Pull your hair back into a pony tail or use a head band to keep all of the hair off of your face. Wash your face and then place a white towel around your neck and shoulders. The pure white cloth will reflect skin undertones. If your face looks yellow next to the white towel you have a warm skin tone and if it looks more blue then you have a cool skin tone.

In both of these “tests,” if you skin doesn’t look any different, then you have a neutral skin tone.

But what does that mean, warm or cool or neutral skin tones?  That doesn’t tell me anything about what colors are right for me!  Never fear.  You also have to take into consideration your complexion-which is your skin’s coloring.  There are 4 basic complexion types:

Fair-you have pink undertones and your skin is sensitive to the sun (you burn easily.)

Light/Medium-you have beige to yellow undertones and must be cautious of the sun because although you tan, you burn too.

Medium/Dark-you have honey to golden undertones and your skin has a natural tan color and darkens easily when exposed to sun.

Dark-you have mocha undertones and though you don’t burn, you’re still cautious when it comes to the sun.

So take your skin tone and your complexion and combine them to figure out what make up colors suit you best.  Neutrals colors like browns, greys and tans are great on everyone regardless-just be sure to pick shades that won’t overpower your skin.  For example, if you’re fair, don’t cover your entire eyelid in the darkest brown you can find.  Instead, choose a lighter brown and line with the dark brown.  The best way to find out what looks best on you is to experiment!  Try stuff out.  Really, any skin tone/complexion can pull off any shade.  It all in how you apply it.  Only thing to stay away from is matching your eyeshadow to your eye color-always a Don’t!  Not that I’m saying that blue eyed girls can’t wear blue eyeshadow, just don’t choose a shade that’s the same as your eyes.

There’s a great feature at mark's website called Shades of You that, using your complexion, shows you shades that work best with your skin for eyes, lips and cheeks.  From there, you can choose from the suggestions which colors will go best with your skin tone.  If your skin tone is cool, choose colors with blueish undertones (for example, with reds, they’ll look more purple.)  If your skin tone is warm, choose colors with yellowish undertones.  If your skin tone is neutral, you’re in luck, wear whatever you want!  If you're able to, test the color on your skin, like on the back of your hand, before using it.  That will give you a good idea of the undertones in it.

Wednesday, May 26, 2010

Get In Shape!

Summer is coming up faster than I'd like and that means bathing suit season! Dun dun dun!  Well, technically, here in Florida, it's been bathing suit season for like a month already.  But I digress.  If you're like me, you've got like 5 pounds that you'd really like gone before you feel totally comfortable in that super-cute suit you bought but haven't worn yet because of said 5 pesky pounds.  For me, it's my mid-section.  Just needs some toning up.  Which means ab workouts.


Fitness for the Rest of Us is generously giving away an Amy Bento Abs and Stretch DVD that will help you (and me) do just that!  She's even got a "sample" workout posted on her blog, so that you can try it out.  I loved it.  It's short and sweet and really works you in just 15 minutes.  I need workouts that really deliver but are short, length-wise, because I just don't have enough time in my day as it is!  I'm sure you all can relate.  That has always been my biggest problem with exercise-finding the time.  Go check out the giveaway, try out the workout and see all of the other great things Lindsey has going on over at her blog!

Some Housekeeping Items

First and foremost, welcome to all of my new followers!  I'm happy you're here and I hope you enjoy what you find!  

I just wanted to say a BIG thank you to all of you who have submitted links and such for the Fashion Friday giveaway.  You guys rock!  And, as promised, here's a few more of the goodies that you could win (in addition to the lip gloss):


If you've been following along for a while, you might remember me drooling over these adorable earrings from Bean's Things.  Well, the lovely Jeanna has donated a pair for me to give away!  How awesome is she?!


I found this super-cute carry-on travel set at the bookstore of all places and thought it would be perfect for all the summer traveling ahead.  Best part, it's all airline-approved!  It comes with: 
2 2 oz. bottles
2 3oz. round containers
1 reusable shopping bag
and 1 clear plastic zipper pouch

I still have a couple more items, so keep sending me your links to find out what they are!  You have just over a week left!

My other announcement is if you notice in my sidebar, I'm now on BlogFrog.  Come join me!  Start a discussion, find other awesome blogs and make some new friends!

Last but certainly not least, Banana Republic is having a one-day online sale.  You can save 30% and get free shipping on orders over $100.  Use the code oneday30 at checkout.

Who's That: Lanie J. and Co.


I'm thrilled to introduce you all to the lovely and talented Lanie from Lanie J. and Co. today.  Lanie is also part of the Trendy Treehouse team.  She let me pick her brain for a bit : ) Hope you enjoy getting to know her as much as I did!


First things first, tell us a little about yourself!

Well, let’s see. I live in the great state of Texas. I landed here about 11 years ago. I’ve been married 8 years this June and I am a SAHM to 2 beautiful daughters, ages 4 and 7 that are growing up much too fast. In our spare time as a family, we like to spend time on the beach, boating or fishing in the neighborhood pond.


What prompted you to start Lanie J. and Co and why?

Lanie J. and Co. originally started out as Creations by Lanie. I started Creations by Lanie to kind of journal a creative journey and the name matched my Etsy shop. Last fall, I changed the name to Lanie J. and Co. to be a little more all encompassing. L.J. and Co.is based upon the principle that God has given us all special talents and wants us to use them to the benefit of others. My sweet mother who passed away in October 2009 left with me a dream to bring back the creative soul within. I have always loved crafting and creating items with my hands. Now I want to create art. Somewhere along the way, I lost the dream of becoming an artist and I want to fulfill it so that my children know that anything is possible. In an effort to encourage them to use their talents, I am trying to use my own to set a good example.

How did you get involved with Trendy Treehouse?

When I did my first giveaway. Tara at Trendy Treehouse was just starting out and looking for a team. She featured my giveaway on her blog and we kind of struck up a friendship. When she posted that Trendy Treehouse was looking for creative team members, I jumped at the chance to meet and learn from other bloggers.

What have you gotten out of blogging and what have you enjoyed most about the experience?

I am constantly amazed at the comraderie and friendships I have made via blogging. I have learned a lot from others and their experiences. I am always inspired by all the creative ladies out there.

What inspires you to craft?

My kids, my love of paper, color, and working with my hands. My mother always has, and still does (even though she is not here) inspire me to create.

What inspires you, period?

I believe I am inspired by God, family and friends to do the things I do each day.

What have been your favorite creations?

My kids! J Oh, you mean craft wise! Well, I love the way my chalkboard flower pots turned out. I also love my decoupage wooden letters and recipe binders.

If you could blog swap with any one person for a day, who would it be and why?

Wow! That is a tough question. You know there are some fantastic creative bloggers out there. I have only done one blog swap and I really enjoyed it. It was with Jamie from Pure Joy. I would love to swap with Tara at New Day New Season or Gay at Hodge Podge Life. I also love Kristi at Punkin Seed Productions.

I collect quotes for my blog.  Do you have a quote you'd like to share?  

Gosh, I love quotes and there are so many to choose from. I actually post quotes on Mondays.  If I had to pick a favorite, it would be this one: "When I stand before God at the end of my life, I would hope that I would not have a single bit of talent left and could say, 'I used everything you gave me.' "-Erma Bombeck 

What do you hope your readers take away from your blog?

I would hope they would be inspired to create. I hope that their experience reading my blog is positive and I absolutely love when someone shares their creative dreams with me.

What one skill do you wish you were better at?

I guess that would be painting. Actually I wish I could be better at not fearing failing. I think I have the talent, but like so many creative individuals out there, I just need to jump off the edge and go for it! J

Isn't Lanie awesome?!  Check out these equally awesome projects and recipes from her blog:


Isn't this banner adorable?  I think I might need to make one for my son's next birthday.


These cookies look so yummy! And soooo easy!


I love monograms-they're a great way to personalize a room-and I love all the little touches on Lanie's.  Plus the combo of the stripes and polka dots is right up my alley!


I'm in love with her personalized recipe binder.  I know a few people that would love one of these as a gift!


I have been hearing about Dr. Pepper cake for FOREVER and I'm definitely going to give Lanie's recipe a try.


These chalkboard flower pots are the cutest things ever!  What a clever idea, Lanie!  

Thanks so much for visiting today, Lanie and sharing with us!  You all seriously need to go check out Lanie and her wonderful blog, Lanie J. and Co. if you haven't already.  You won't be disappointed.

Tuesday, May 25, 2010

Good Eats and Yummy Treats: Chicken Pockets


Going to switch things up a bit this week and share a recipe instead of a craft for this week's Hand-made Goodie.  These yummy chicken pockets are easy and delish and a staple here at our house.

You'll need:

3 cups cooked, diced chicken
2 oz. cream cheese, softened
1 tbsp. green onion
2 tbsp. melted butter
2 tbsp. milk
1/2 tsp. salt
Dash of pepper
1 package of crescent rolls


In a medium-sized bowl, combine all of the ingredients minus the rolls.  Mix together until well-blended.  


Take the crescent rolls and make a rectangle by pressing two triangles together.


Like this.


Put a scoop of the chicken mixture in the middle


Fold over the sides and pinch together to seal


Then press the ends together to seal


Place on a foil-lined tray and bake at 350 degrees for 15-20 minutes.  They should be golden brown.


Serves 4.


And they're super-yummy : )

Monday, May 24, 2010

Falls

I have a thing for waterfalls.  Don't really know why.  I just think they're beautiful.  


This is Multnomah Falls, Oregon.  I took this when my husband took me back in 2006.  We went up to Washington so that I could meet the rest of his wonderful family.  We also went site-seeing and this is one of the places we went.  I loved it.  

(For you Twilight nuts, yes this is the waterfall in the first movie.)

I'm entering it in this week's Shutter Love over at Trendy Treehouse.  


ShutterLoveTuesdays

Come check it out!

Saturday, May 22, 2010

I guess this means...

..that you all like me, you really like me!

Just kidding with the theatrics there.  Chalk it up to my college drama club days.  But in all seriousness, I do want to thank Kimbo West from A Girl and A Glue Gun for finding me and giving me this:


You are too kind! 

You can check out Kimbo and her adorable blog

A girl and a glue gun

And now to pass it along.  I love awards that you get to give to others!  Here are the rules:

1) Thank the person who gave you the award.

2) Share 7 things about yourself.

3) Pass the award on to 10 bloggers you've recently discovered and think are just fabulous (in no particular order.)

4) Let those bloggers know you've selected them for this award so that they can pass it on, too!

Ok, so 7 Things About Me:

1.  I am in no way, shape, form or fashion a morning person.  I don't think I ever will be.  8:30 is early for me.

2. My favorite thing to do in the whole wide world is just goof off with my husband and son.  

3. I hate pink.  I'm probably one of the only girls in the universe to say that.  Not that I won't wear pink.  I own some pink.  But it's definitely on the bottom of my list of colors I like.

4. Having said that, if I ever have a daughter, she will probably love pink.  And I won't care.

5. I could spend every penny I ever earned on make-up or craft things.

6. I wish I could play an instrument really, really well.  Preferably the violin.

7. When I was younger, like high school younger, I thought I'd never get married.  My plan was to move to NYC, pursue a theater career, be a poor, starving artist and have 10 cats.  Didn't happen and I'm so glad about that.

And the awards go to:


You ladies rock!


Friday, May 21, 2010

Fashion Fridays: Showing Off

Welcome back to another Fashion Friday.
This week I'm shamelessly showing off my sister Emily's awesome shirt make-over.  Check it out!


She saw this at Wet Seal and like a true Kanar girl, thought "I could make that."


So she did.


I'm thinking I need make one for myself.

Don't forget to either link up your fashion-related posts or email your fashion to enter the Fashion Friday giveaway!

Thursday, May 20, 2010

Tipping Thursday: Skincare Part VII-Masks

Masks are a great pick-me-up for your skin.  You can do them about once a week, if you can fit it in or monthly.  They definitely aren't an every day skin product, so once a week should be the max.  They're a nice way to take a break, do something nice for yourself and just relax.

Masks are also great for targeting specific skin problems, as there is a mask for nearly every skin condition and ailment.  There are masks that hydrate, reduce oil, firm, clean and shrink pores, assist with acne or just give skin a little extra boost.  Always be sure to read the label instructions.  Every mask is different in how it is used-some masks you only leave on for a short period of time and others you wait til the mask is dry.  I've learned from personal experience to always read the instructions.  I was using a mask that contained benzoyl peroxide and thought it was like any other mask where you leave it on until it's dry.  I burnt my skin pretty bad.  It was red and hot and puffy for the rest of the day.  Turns out, that mask was only meant to be left on for 5 minutes-I had left it on for over 15! 

Go give yourself an at-home facial and relax!

Passing the Love Along

Just wanted to let you all know that I'm experiencing some technical difficulties with my comments.  I don't know what's up, but I've sent an email along to Blogger and hopefully, it will be resolved soon.  Please feel free to still leave comments-just know they might not show up right away.

On to happier matters.


I received this awesome award today from the talented Kami from Sweet Charli, who was our awesome guest yesterday.  Thank you so much, Kami!  You make me blush : )

The fun thing about this award is that you get to pass it on.  Here are the rules:

In order to receive this award you have to promise to share this with 10 other BLOGS that you think are Trendy too! It is just that simple.

Just post about your award in your blog
List your Top Trendy Blogs
Share with them and
Leave a link to the Trendy Blog Button (so they can grab it to)
Make sure you tell them the same, that they need to give this award out to 10 as well.

So here are my picks of Trendy Blogs that I love, in no particular order:


If Work Permits
West Sac Honey
Mod Podge Rocks!
Tatertots and Jello 
(I'm sure Jen's gotten this award like a thousand times, but I do love her and her blog, 
so here's one more, Jen!)
Melissa's Heart and Home
Lanie J. and Co.
Myla Rose
A Pretty Cool Life
Mad Boastings of a Cheapskate Mom
Red Heads Craft More Fun


Wednesday, May 19, 2010

Who's That: Sweet Charli

First things first, thanks to Random.org, we have a winner of the Tile Pendant Necklace giveaway.

#5- Erin L., who said  "I really like the 10 Charm Bracelet from Imjewelee. I would use it to make a beaded charm bracelet." (her comments got accidentally deleted, in case you're wondering what's going on.)

Congrats, Erin!

Please email me your info (address and which necklace you'd like) as soon as you can and I'll have your prize off to you, lickety split!

Now, on to this week's Who's That.

I am very excited to introduce you all to the amazing Kami from Sweet Charli.  She's been gracious enough to share one of her super-cool tutorials with you all today.  Take it away, Kami!

Hello all you Scraps and Scribbles readers! I feel very honored to be a guest blogger on Courtney's wonderful blog! She is very talented, and not to mention sweet! I especially love her darling tile necklaces...did you see her tutorial??

A little about me, my name is Kami from Sweet Charli Boutique & Blog.

I am a mother of ONE, to my sweet Charli girl! I always put girl at the end because typically, people think of Charli as a boy name. But after reading (and watching) Jack Weyland's "Charly", (you MUST see) I couldn't resist the name - and after years of waiting until it was the right time for a baby girl, I finally got to name my baby after her! I have been married for 4 1/2 years, to my high school sweetie!!  And obviously, I love to craft! I especially love making things for myself, like cute earrings and rings found HERE & HERE, fun flip-flops HERE, and my corsage wristlets, which I am sharing with you right now...enjoy!

Look for the "no-sew" version of these babies HERE


The possibilities are ENDLESS!

Here is what you need:
Ribbon (any size, but I like best and am using 1 1/2 inch ribbon)
Top ribbon (1/2 inch works well with this)
Sewing machine
Jewelry fastener
Any embellishment you want on top
(silk flowers, ribbon flowers, fabric flowers, broach)

Take your ribbon and ruffle it by pinning it and then sewing


Here's what it looks like after it's been sewn


Then sew the smaller ribbon on top, sew up the ends, and give it a nice button hole


Sew on your jewelry fastener on the other end


And wahlaah! Easy huh? And super-cute for Spring! I cannot tell you how many compliments I get when I wear mine out!


You will find that after making these, you will no longer match your bracelet to your outfit, you will match your outfit to your bracelet!!

Thanks Courtney, for inviting me to guest-post! Hope you all enjoy your new bracelets!
LOVE, KAMI

Thanks so much for sharing, Kami!  Be sure to stop by her blog and check out all of Kami's creations over at Sweet Charli!

Tuesday, May 18, 2010

Hand-made Goodie of the Week: Scrabble Tile Pendants


These are one of my favorite craft projects.  They make great gifts.  To make your own, you'll need:


Wooden Scrabble-style tiles (I found mine at Michaels in the wooden shapes section)
Scrapbook paper, photos, whatever image you'd like to use (I used flowers from a tissue box-anything goes!)
Glue-on bails
Necklace cord or chain
Clasps
Utility knife
Hot glue, glue stick
Mod podge
Diamond Glaze-this can be hard to find, I suggest going to the Judi Kins (the manufacturer) site and locating a retailer
Thin cardboard
Pencil and sponge brush


Start by tracing your tile onto the cardboard, near the middle.  This will be your guide for cutting out the image you will use for your tile.


Using the utility knife, cut out the traced square.


Then, using your awesome new guide,


cut out the image that you want to use.  You can also just trace the tile around the image, but I prefer to use the guide-no lines that way.


Now it's ready to be glued onto your tile.


Here' where your glue stick comes in.  Apply a generous amount of glue to the back of your image-I like to put some glue on the tile as well.  You really want it stuck on there nice and good so your corners don't lift up and you don't get any bubbles when you Mod Podge it.  Press it on firmly, smoothing out any bubbles.


You might have some edges to trim up once it's glued on.  We'll get to that in a minute.


Once your image is glued on to your tile, apply a thin layer of mod podge, getting all around the edges of the tile, too.  This seals it and keeps your image from lifting or getting ruined.  Let it dry for about 20 minutes.


Once the mod podge is dry, turn it over and trim up any edges that are hanging off.  I like to wait until after I'v mod podged it because the mod podge makes the paper stiffer and easier to trim.  After trimming, apply another coat of mod podge.


Once the second coat of mod podge is dry, it's time for the diamond glaze.  This is what gives your pendant that cool raised look.  Start by outlining the edges (this is what keeps the diamond glaze from spilling over the sides of the tile) and then fill in the middle.  I recommend that before you start this step, you place your tile on a cookie sheet or something else that is flat, level and portable.  Diamond glaze takes up to 4 days to set so you'll need to put it somewhere it won't be disturbed.


Once your diamond glaze is dried and set, it's time to attach your bail.  Using a small dot of hot glue, glue the bail to the back of the tile.  Then string on your necklace and wear with pride!

If you're the instant gratification type and don't feel like waiting 4 days, you can check out the tile pendant selection in my shop.  And you can enter to win one here on Scraps and Scribbles-the giveaway ends at midnight tonight so hurry and get your entries in!
Related Posts Plugin for WordPress, Blogger...